Azure IoT Central
/When it comes to Azure and the Internet of Things (IoT), there are several options that can be considered in order to come up with a design that encompasses the common objectives (Device Connectivity, Data Processing & Analytics, Presentation & Business Connectivity) typically sought after in an enterprise-grade solution.
Options:
- Pick and choose (a la carte) from the laundry list of Azure services to come up with something custom.
- Deploy a pre-configured solution with Azure IoT Solution Accelerators (formerly known as Azure IoT Suite).
- Azure IoT Central - A fully managed SaaS (software-as-a-service) offering.
Azure IoT Central aims to lower the barrier of entry by abstracting much of the complexity and technical debt typically required to deploy and manage an IoT solution. If you are looking to accelerate time-to-value and don't require deep levels of service customization, Azure IoT Central is a great place to start.
Note: Azure IoT Central and Azure IoT Solution Accelerators are underpinned by the same services typically found at the core of any Azure IoT solution (e.g. Azure IoT Hub, Stream Analytics, Time Series Insights, etc).
UI Overview
Home
The homepage is the landing area for your IoT application. When in Design Mode (top right-hand corner), you can customize your homepage by adding new or editing existing tiles. At the moment, tiles can either be in the form of a Link (Title, URL, Description) or an Image (Title, Image, URL).
Device Explorer
Device Explorer provides a list of device templates (aka device types) and devices associated with those templates. It is within this section that you can add real or simulated devices.
Analytics
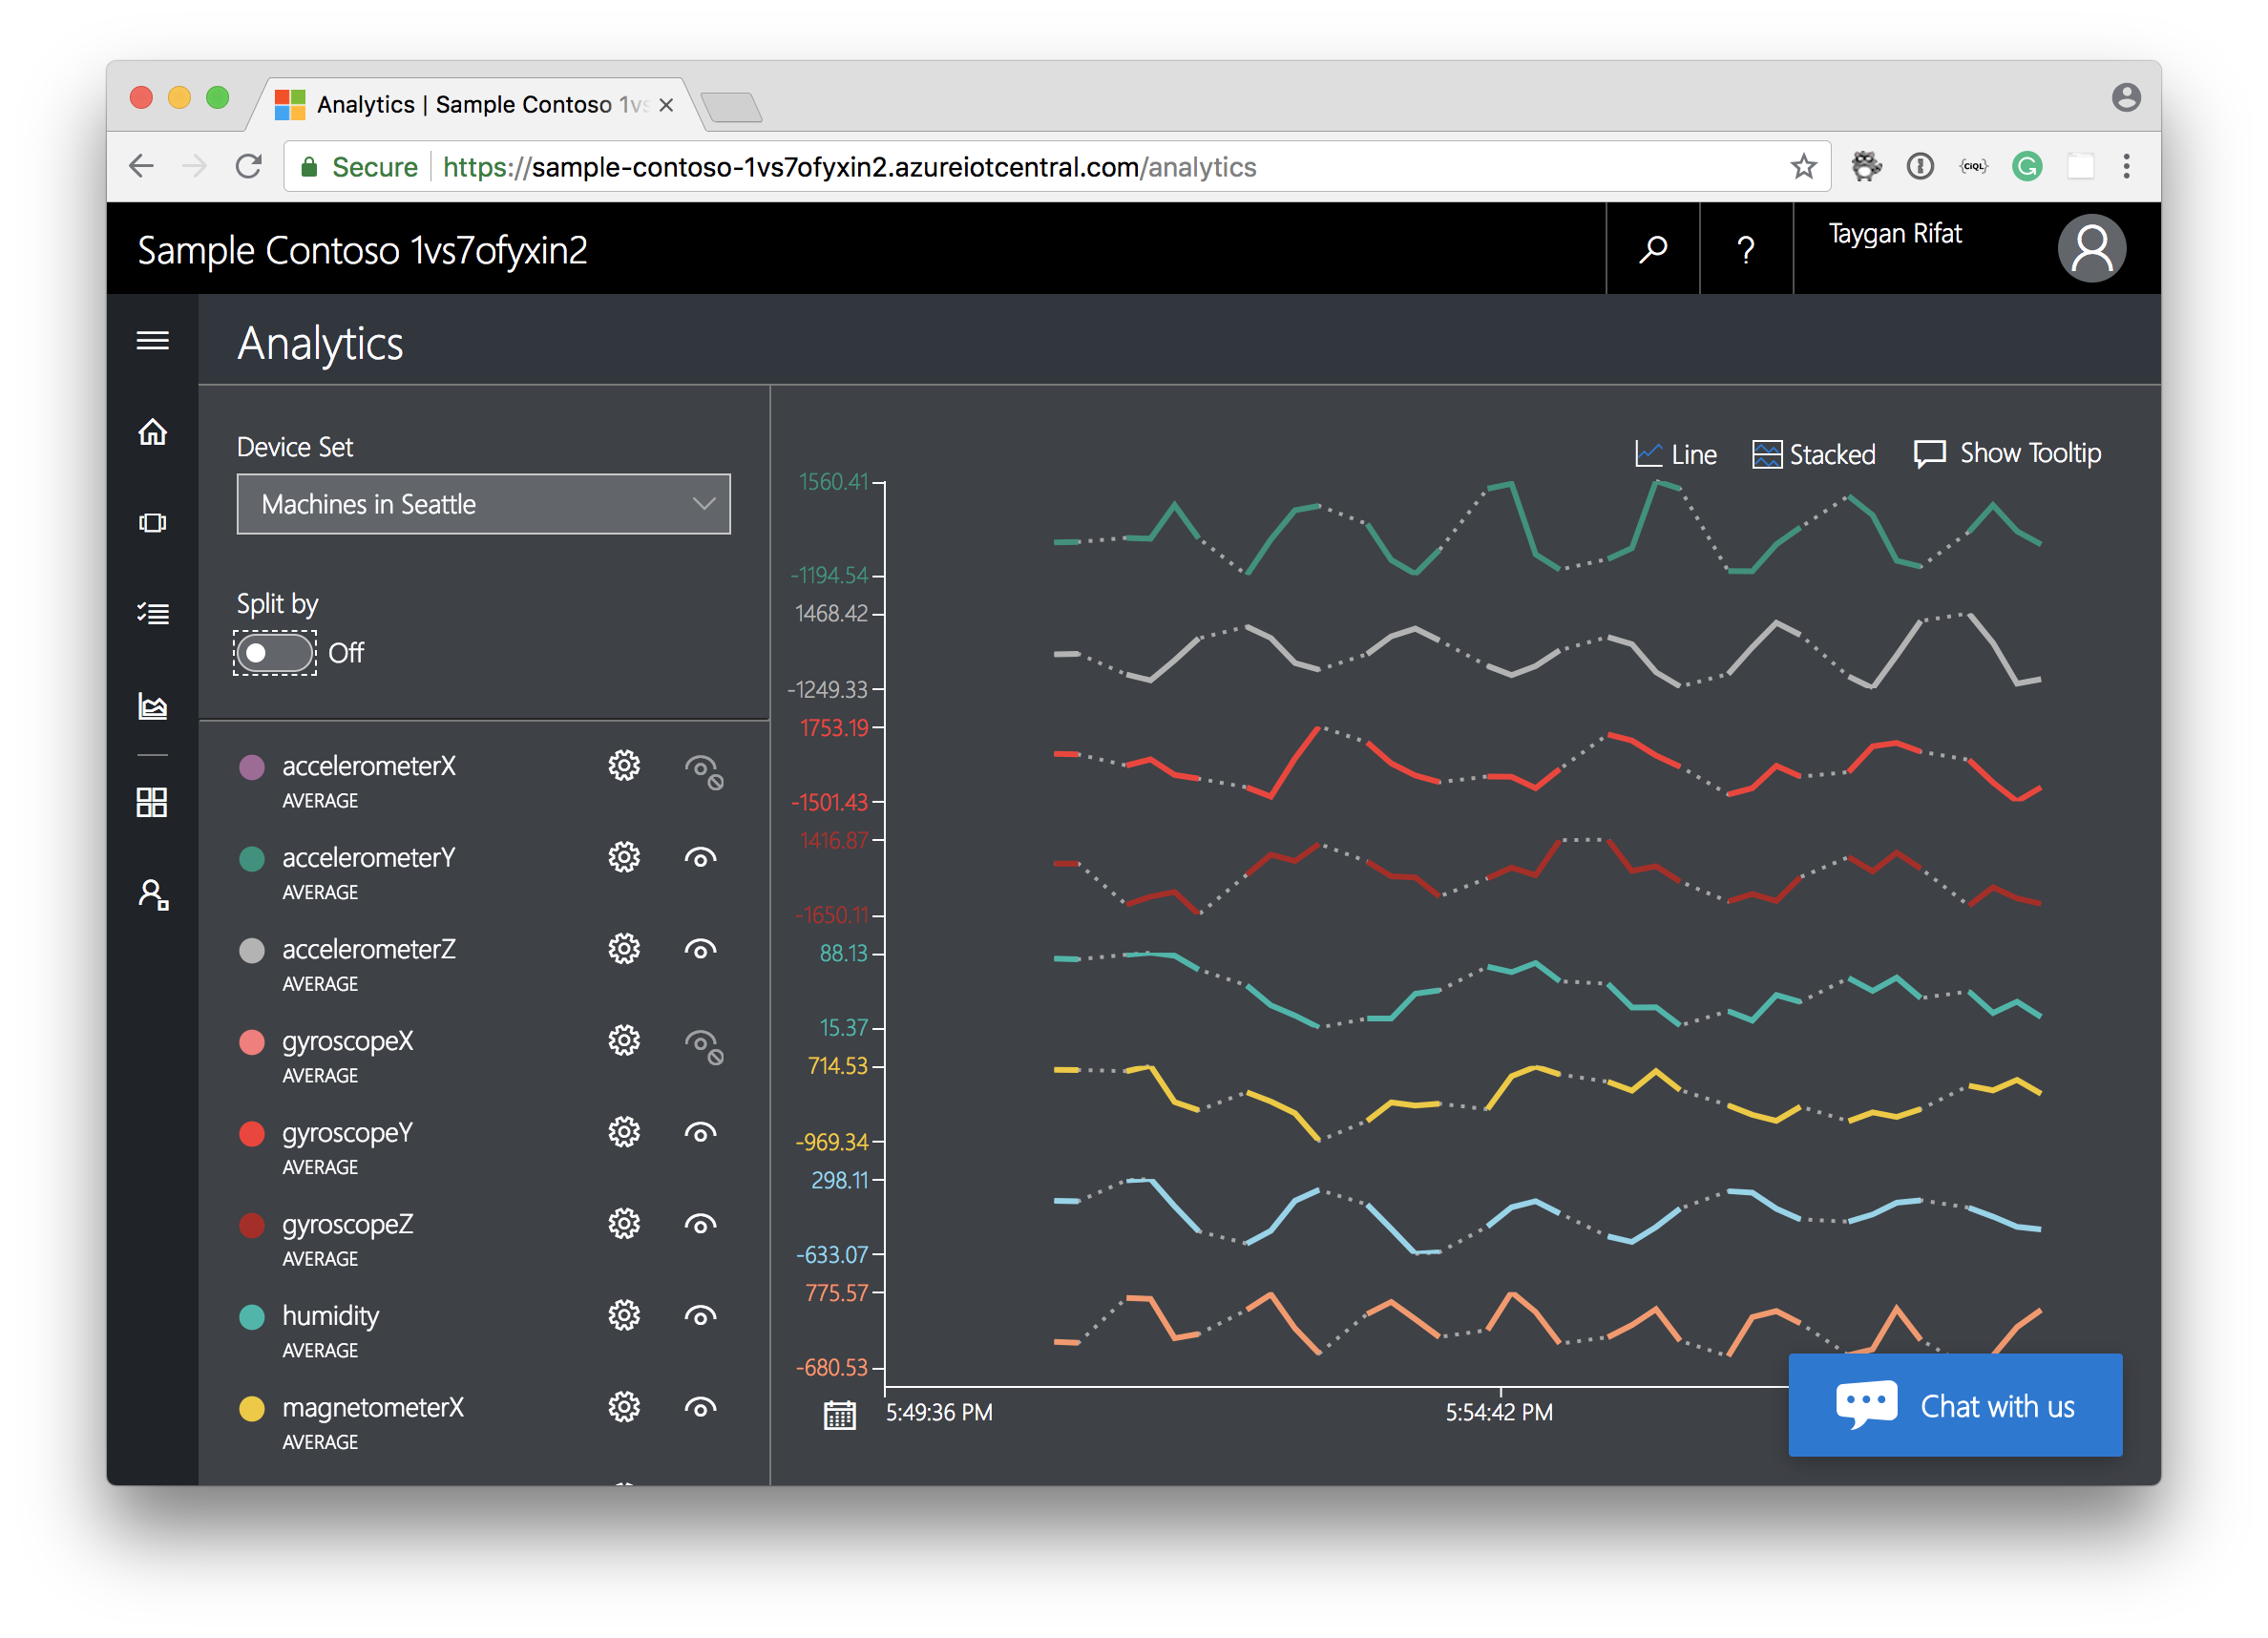
The Analytics page visualizes data from connected IoT devices, allowing operators to analyze and monitor for potential issues. This section allows for a certain level of customization (e.g. switching between device sets, toggling measures to be visible or hidden, changing the aggregation type, etc).
Device Sets
Device sets allows us to define a grouping of related devices (i.e. a sub-group of devices within a particular device template). For example, I may define a device template (aka device type) of Raspberry Pi, but would like to sub-group devices of this type by particular characteristics to manage them as a collection (e.g. by Customer, Installation Date, Manufacturer, Location, etc).
Application Builder
Application Builder has links a builder can use to either create a device template (Application Builder > Device Templates > Custom) or configure the home page (i.e. Homepage with Design Mode toggled ON).
Administration
The Administration section enables an Administrator of the application to configure:
- Application Settings (Image, Name, URL)
- Delete the application
- Add or Delete Users
- Extend your trial or convert to paid
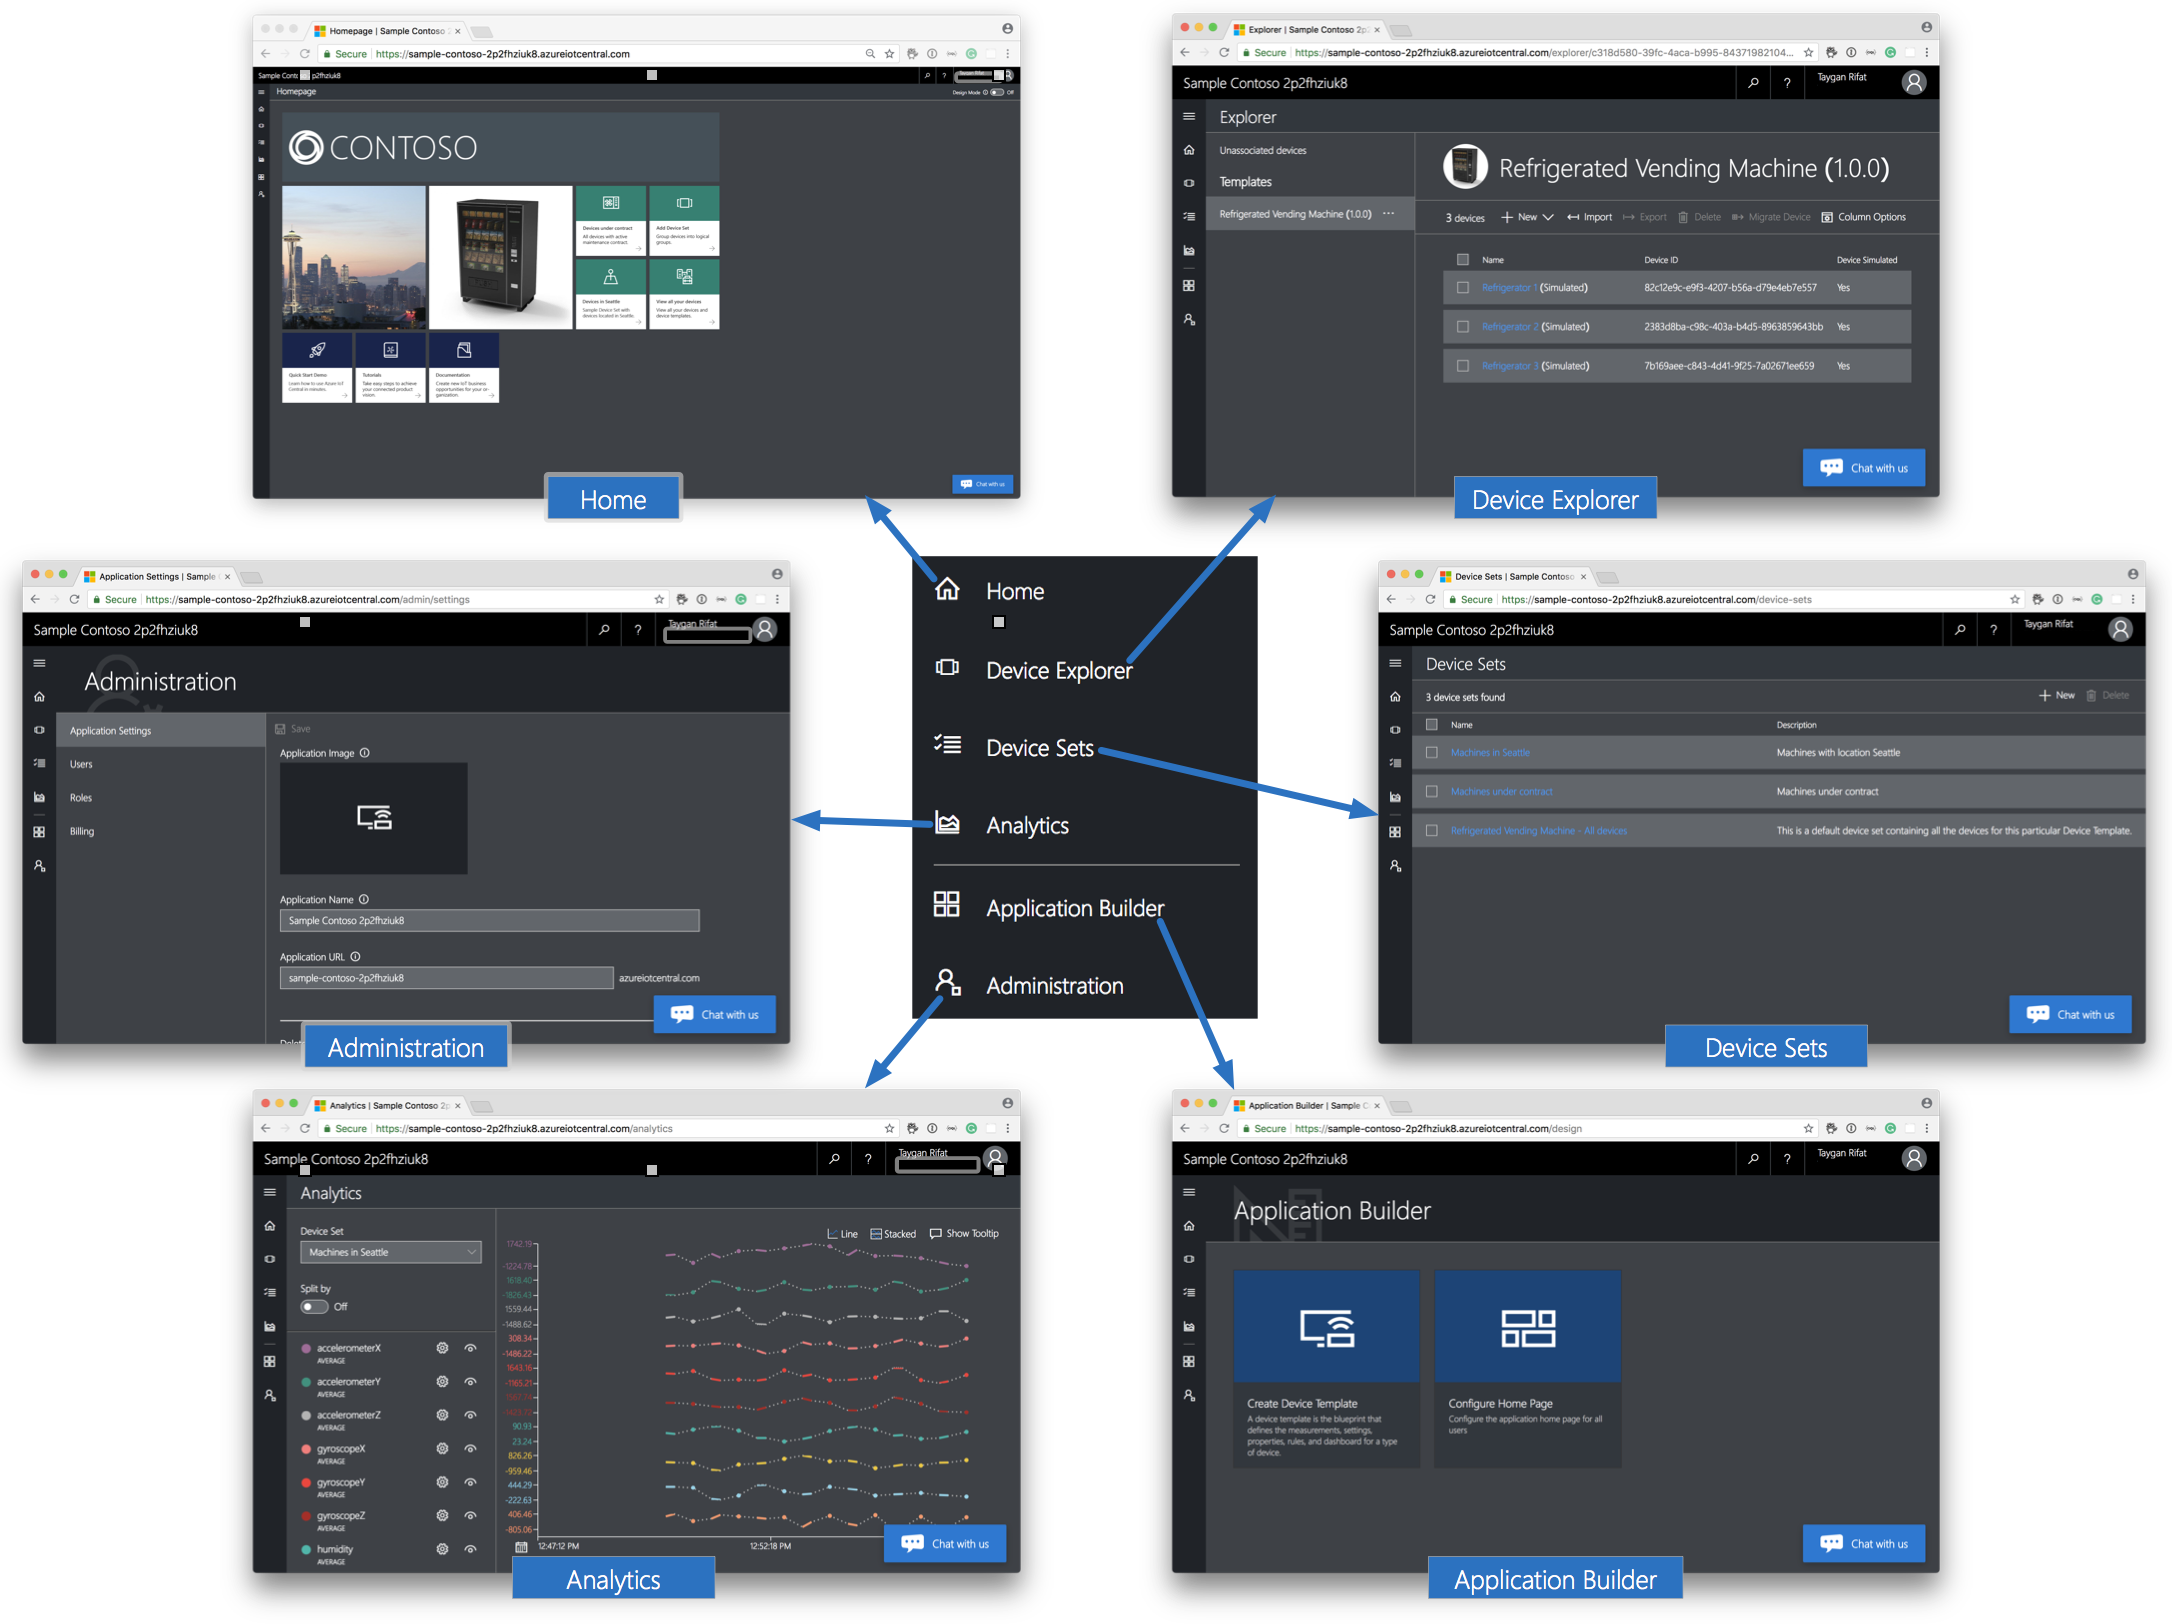
Note: The image below provides a helicopter view of the primary screens when using the sample Contoso application. These sections are accessible from the side menu panel.
Demo: Build an IoT Application in Minutes
Prerequisites
- A valid Azure subscription.
1. Get Started
- Navigate to https://apps.azureiotcentral.com/
- Sign-in with your Azure username and password.
- Click New Application
2. Create Application
Choose the following options:
- Payment Plan = Free (7 Days Trial)
- Application Template = Custom Application
- Application Name = <enter any name> (e.g. My First IoT Application)
Click Create
3. Configure the Homepage
- Toggle Design Mode ON (top right-hand corner)
- Hover your mouse over one of the existing tiles until you can see a pencil and cross (X) icon, click the (X) to delete the tile.
- Repeat this step until all existing tiles have been deleted.
- Click Image, and upload an image (e.g. company logo) then click Save.
- Click Link and set the following properties:
- Title: Azure IoT Central
- URL: https://docs.microsoft.com/en-us/azure/iot-central/
- Description: Azure IoT Central is a fully managed SaaS (software-as-a-service) solution that makes it easy to connect, monitor and manage your IoT assets at scale.
- Click Save
- Hover over your newly created tile and move your mouse to the bottom right-hand corner until you see the cursor change to indicate that you can click and resize the tile. Resize the tile so that it is double the standard width.
- Finally, turn Design Mode OFF.
Upon completion, your home page should look something like the below.
4. Device Template
Before we can start adding real (or simulated) devices, we need to create a device template. You can think of a device template as a way of describing a device type (e.g. Smart TV, Thermostat, Lighting) that defines the characteristics and behaviors of devices that will ultimately send data back to Azure IoT Central.
In this demo, my MacBook Pro will act as the IoT device and therefore I will create a 'Laptop' device template.
- Navigate to Application Builder > Create Device Template > Custom
- Enter a name (e.g. Laptop) and click Create
- Click + New Measurement
- Select Telemetry
- Set the following property values:
- Display Name: CPU Usage
- Field Name: cpu
- Units: Percent
- Minimum Value: 0
- Maximum Value: 100
- Decimal Places: 1
- Click Save
- Jump to Properties
- Toggle Design Mode ON
- Click Text
- Set the following property values:
- Display Name: Manufacturer
- Field Name: manufacturer
- Click Save
5. Add a Real Device
- Navigate to Device Explore
- Click on the + New dropdown menu and click Real
- Click on the image to update the device logo.
- Click on the text on the right-hand side of the image to rename the device (e.g. Taygan's MacBook Pro)
- Navigate to Properties and update the Manufacturer (e.g. Apple) and click Save
- Near the top right-hand corner, click Connect this device
- Copy the primary connection string (make a note of this value to be used later in the code sample, e.g. paste into a text editor).
6. Setup a Python environment
The code sample was made to work with Python 3 (I'm specifically running 3.6.4). If you haven't already installed Python 3, do that first. In addition to the standard libraries, you will also need to install requests and psutil.
pip install requests
pip install psutil
7. Update and Execute the Code
The primary connection string that was copied in the last step within 5. Add a Real Device should have looked something like this...
As you can see in the string, there are values for HostName, DeviceId and SharedAccessKey. Extract the values to update the appropriate variables within the code. For instance, the above example would look like...
- Copy and paste the code into a file within your Python environment (e.g. handler.py).
- Update the variables HOST_NAME, DEVICE_ID, and SHARED_ACCESS_KEY with the values from your primary connection string.
- Execute the python script (e.g. python handler.py).
Note: If successful, this will start sending CPU usage from your device to Azure IoT Central.
import base64
import hashlib
import urllib
import hmac
import requests
import json
import time
import psutil

# Azure IoT Hub
HOST_NAME = 'ENTER_YOUR_HOST_NAME'
DEVICE_ID = 'ENTER_YOUR_DEVICE_ID'
SHARED_ACCESS_KEY = 'ENTER_YOUR_SHARED_ACCESS_KEY'

# Programmatically generate a SAS token for using the IoT Hub REST APIs
# https://docs.microsoft.com/en-us/rest/api/eventhub/generate-sas-token
def generate_sas_token():
    expiry=3600
    ttl = time.time() + expiry
    sign_key = "%s\n%d" % ((urllib.parse.quote_plus(HOST_NAME)), int(ttl))
    signed_hmac_sha256 = hmac.HMAC(base64.b64decode(SHARED_ACCESS_KEY), sign_key.encode('utf-8'), hashlib.sha256)
    signature = base64.b64encode(signed_hmac_sha256.digest())
    rawtoken = {
        'sr' :  HOST_NAME,
        'sig': signature,
        'se' : str(int(ttl))
    }
    return 'SharedAccessSignature ' + urllib.parse.urlencode(rawtoken)

# Send data to IoT Hub
def send_message(token, message):
    url = 'https://{0}/devices/{1}/messages/events?api-version=2018-04-01'.format(HOST_NAME, DEVICE_ID)
    headers = {
        "Content-Type": "application/json",
        "Authorization": token
    }
    data = json.dumps(message)
    requests.post(url, data=data, headers=headers)

if __name__ == '__main__':
    # 1. Generate SAS Token
    token = generate_sas_token()

    # 2. Simulate IoT Device
    while True:
        datapoint = psutil.cpu_percent()
        print(datapoint)
        message = {"cpu": datapoint}
        send_message(token, message)
        time.sleep(1)
Finally, navigate to the Analytics section via the side menu to confirm the data is indeed being received by Azure IoT Central and automatically visualized for further analysis.
And of course, you can add additional devices by going into Device Explorer and then copy the connection details to the scripts running on the other devices (e.g. other laptops). In the final example, I have the Python script running on my MacBook Pro, Surface Laptop and Raspberry Pi. Note the ability to split the measure (CPU Usage) by a property (Manufacturer).


